


CombatMedic
套
| 排名 | 套币名称 | 组成名 | % 完成 | 加权 平均分 | 套币评分 | |
|---|---|---|---|---|---|---|
| 413 | CombatMedic | Apollo 11 50th Anniversary Complete Set, Circulation Strikes and Proof (2019) | 12.50% | 71.00 | 03.94 | |
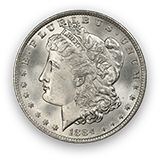
| 934 | CombatMedic | Morgan Dollars Basic Set, Circulation Strikes (1878-1921) | 20.62% | 57.88 | 06.79 | |
| 678 | CombatMedic | Early S Mint Morgan Dollars Short Set, Circulation Strikes (1878-1882) | 60.00% | 63.00 | 42.00 | |
| 361 | CombatMedic | Morgan Dollar Mintmark Set, Low Ball (1878-1921) | 80.00% | 44.83 | 43.06 | |
| 83 | CombatMedic | Mexican Onza Silver, Circulation Strikes (1982-present) | 2.22% | 71.00 | 01.34 |